Rear doors and front doors revisited
After deadening the front doors it was time to do the same in the rear doors. The method used was the same, small pieces of Dynamat in the inner and outer door skin to add mass, closed cell foam for decoupling and MLV to block the noise.
The rear doors are smaller than the front ones by quite a bit, so less material was used. The back of the door trim is also straight so it was much easier to fit MLV.
Taking a look at the doors
I didn't remove the door cards before, unlike with the front ones to test for clearances, so I had no idea if there was enough space for MLV.
The back of the door card is straighter, without that weird lump for the water bottle area that exists in the front. This turned out to be a life saver as that made fitting the MLV much easier.

The setup is very similar to the front, but the support where the door handle is bolted on sits on a metal bar, at the front it's a bracket that sits against the inner door skin.

The weirdest thing is the speaker. The Ampera has a Bose sound system that is supposed to be super efficient in terms of power usage. The front woofers work at 1ohm and are the standard 16.5" size.
At the rear they decided to have a tiny speaker that works at 4ohm and although the enclosure is the same size as the one at the front they choose to use a very small speaker that either has a crossover that only allows mid-range and high-range frequencies or the speaker itself is not capable of playing low-frequencies.

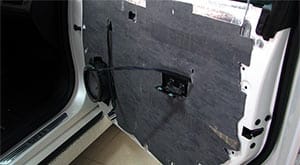
After taking the door sealing sheet out I could see that there wasn't much space available to work with, but like at the front there was already some deadening materials applied, the crash structure was decoupled from the outer door skin and every hole was plugged with a rubber grommet to stop sound propagation.


Adding Dynamat
Dynamat Extreme was added to the outer and inner door skin. I would knock on the metal and add Dynamat to give it mass and make it sound solid.
I added a big piece of Dynamat behind the speaker not to improve it's sound, as they contribute zero to the sound quality inside the car, but to avoid leaking sound to the exterior.


Just like at the front I added some Dynamat on the lower and rear areas of the door to block rolling noise entering the door and making it work as an resonance box.

After that Dynamat was applied in the inner door skin, window elevator and door frame.


The same procedure was then done on the left rear door.
MLV on the rear doors
After Dynamat the next step is MLV. This time, and having gained experience after doing the front doors, instead of using Dodo Super Liner at 6mm I used Dynaliner 1/8" that is approximately 3mm thick.
Also I didn't use the door card as a template but the door sealing sheet. Two reasons, it covers almost the entire area of the door, it won't interfere with the door card clips like it happened on the front doors.

To keep the MLV vertical I used the screws that hold the door card supports in place, thus allowing me to cut areas that were needed to pass cables and allow the door opening handle to move.

And this proved to be a sensible approach for the doors as the door card trim snapped in place in just one move. I couldn't be any happier after the issues with the MLV and the front doors.
And here is the door card in place.

Results and added weight
I didn't expect any differences with the sound meter and I wasn't wrong. The rolling noise from the rear still gets inside, but now it's localized, entering only from the boot. I guess the rear doors were letting some rolling noise in, but not anymore.
The biggest difference is when passing cars, I can no longer listen the tire roar or engine noise coming in from the doors, and that's a great result.
The door now closes with a satisfying sound, a very solid door.
In terms of weight, as the doors are smaller, the amounts were lower. For example, the front door trim card weighs 3.6Kg, the rear 2.6Kg.
So each door got approximately 300g of Dynamat Extreme and 1Kg of MLV. Dynaliner didn't even register, so less than 100g on both doors.
Revisiting the front doors
As everything went so well I had time to revisit the front doors. I took the door cards out again, inspected the MLV to make sure it was in place and there where any issues.
Then I took the speaker out and added Dodo Super Liner behind it to improve sound quality and avoid speaker reverberation.

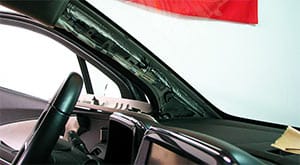
The doors are now finished. Next step might be the A and B pillars to improve sound quality and reduce airborne noise or maybe the kick panels to reduce rolling noise.
Done in 20 of October, 2018